Collecting Desmids
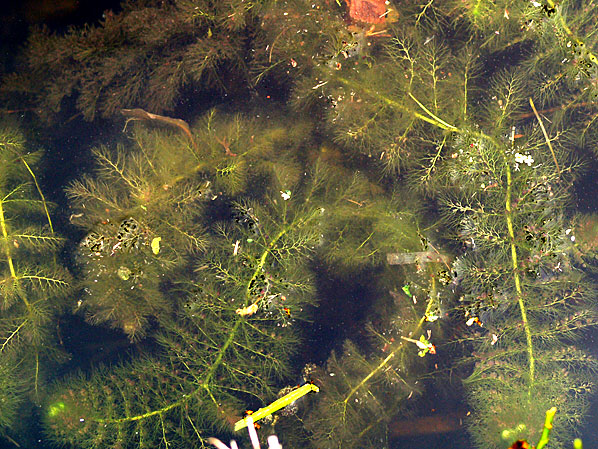 Photo 1: Common Bladderwort is found mainly in relatively eutrophic, about pH neutral waters. In oligotrophic, acidic environments, Bladderwort species are usually smaller. In both cases Bladderwort is ideally suited for collecting desmids. |
Where to find Desmids?
Aquatic plants, preferably with fine feathery leaves, are a very suitable location for collecting desmids. Bladderwort-species (Utricularia) rise head and shoulders above the rest. Species of this genus of carnivorous plants usually deliver a wealth of desmid species and on fieldtrips they are always especially sought for. But also other aquatics with fine feathery leaves, weeds such as watermillfoil (Myriophyllum) and some species of pondweed (Potamogeton) can yield a rich harvest. Peat moss (Sphagnum), a moss that is common in very nutrient-poor environments, is also an important repository for desmids with often very different species than on Bladderwort. Other plant substrates where desmids can be found are roots of common reed, flab (floating filamentous algae beds), but also dead plant material of unclear origin may yield interesting findings. Finally, desmids found on the shore soil itself. It is therefore important to take stock of one of several types of substrate to collect samples. Don't sample just the open water. On shores where the vegetation is so dense that the water is barely visible, many desmids can be found. Remember that before it is sampled, the water level may have been higher and that desmids may remain as a thin layer on the shore. Desmids are microscopic and can live in thin films of water. Some species even have a strong preference for these thin water films and this is called a (semi) atmophytic lifestyle. These species are resistant to desiccation. Moist areas where free water is barely visible, such as wet heathland, meadows and moss-cushions may therefore not be omitted when collecting desmids. The same goes for wet spots just above the water level (splash zone) and rainwater trickling through rocks and walls. Many species found here are not found elsewhere. Desmids can even be discovered in fountains and rain gutters! Based on the different places where desmids are found techniques have been developed to collect them. Below the most common techniques are discussed. |
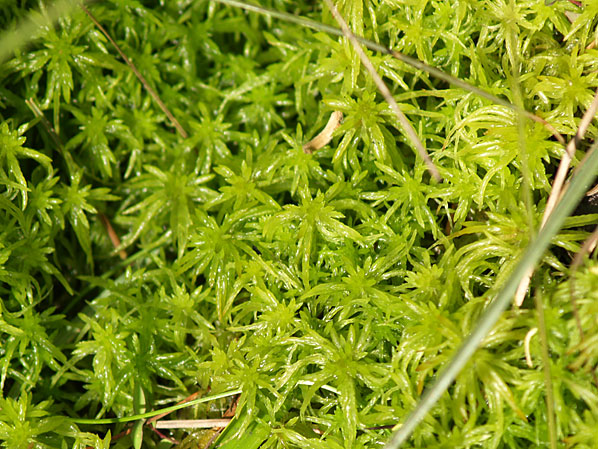 Photo 2: Peat moss (Sphagnum) can grow both under water (submerged) and above (emerse). Although peat moss is mostly found in temperate regions and mountainous areas, it can also be found on the equator, where this picture was taken. | |
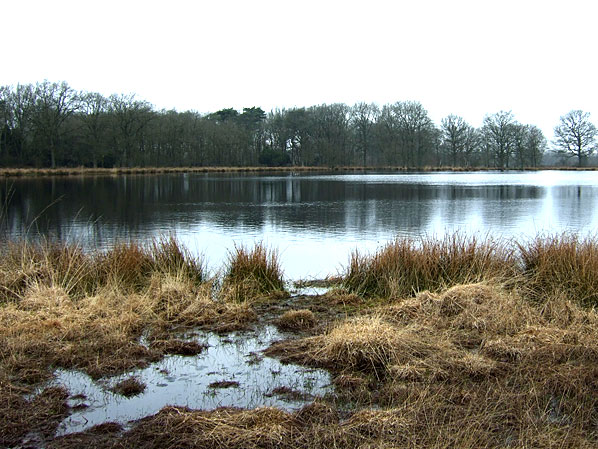 Photo 3: A moorland pool with a swampy shore edge in the province of Drenthe. | |
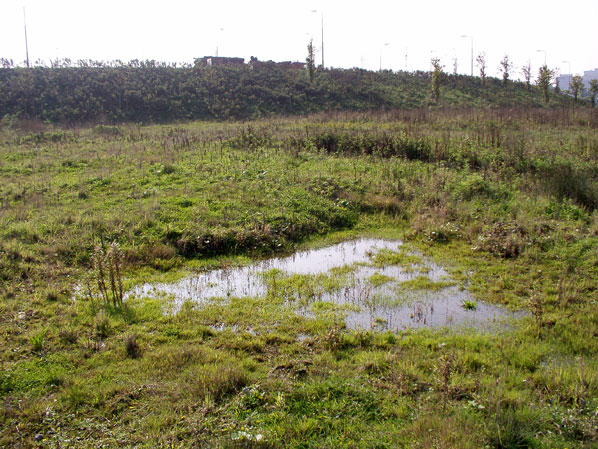 Photo 4: A puddle along the highway. Because road construction waste is used for the reinforcement of the dike, a hard underlay is created on which rain water remains. These pools can yield more interesting species than the surrounding (contaminated) ditches. |
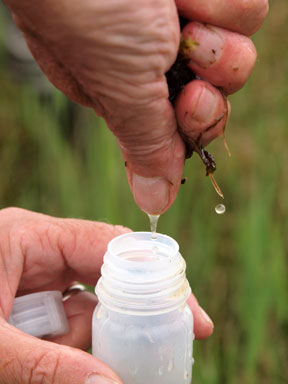 Photo 5: With the help of the thumb the water is squeezed easily into the sample bottle. |
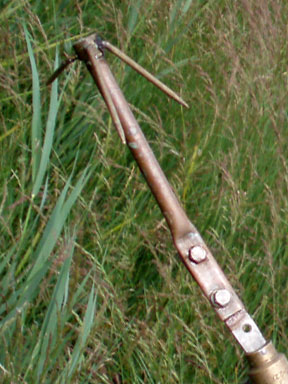 Photo 6: A hook with a long handle is useful for sampling further from the shore ... |
Squeeze SamplesThis is a very useful technique known as squeezing. Samples collected in this way are called squeeze samples. First, pick organic material collected in the hand. By gently squeezing, a portion of the excess water is removed. Now, with your thumb pointing down, squeeze very hard to extract the water from the vegetation. Let it run along the thumb, allowing it to drip into the sample vial (photo 5). Then, to minimize damage to nature, do not discard the squeezed remnants on the side, just put it back to where it was collected. Plants that grow close to the shore are easy to collect by hand. To collect plants further from the shore a (telescopic) stick can be used which is connected to some gripping tool such as a rake or hook (photo 6). Also a piece of rope with an anchor attached can be used (photos 7 & 8). Likewise a plankton net can be used for that purpose, more about that later. Or just rent a boat. When squeezing water plants, it is important to minimize the amount of soil material, because it often contains sand. Sand particles are not comfortable under the cover glass when microscoping and all kinds of organic debris can clog the algae. Sometimes the vegetation is only a thin layer of plants covering a muddy surface. This is often the case along shores. In this case scraping the vegetation without taking mud is difficult. Then the cap trick helps. By pushing a cap of a sample vial upside down in the vegetation (even by foot), the water runs over the edge of the cap, without the mud coming along (photos 9 & 10). The cap can then be emptied into the sample vial. The same trick can also be done with a spoon. A white plastic spoon (photo 11) is probably the most useful. |
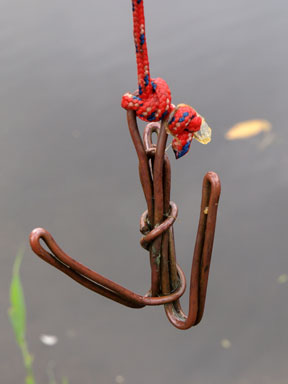 Photo 7: ... With a (homemade) anchor on a long piece of rope one can get even further. |
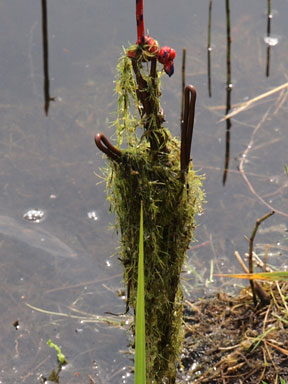 Photo 8: The catch of a grapnel. | |
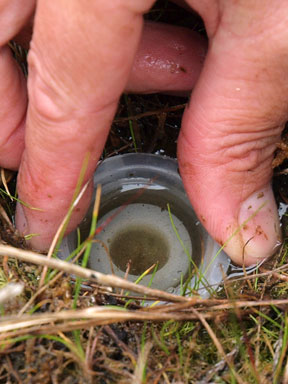 Photo 9: The cap trick.. |
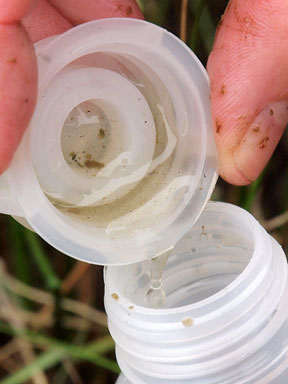 Photo 10: ... and the result |
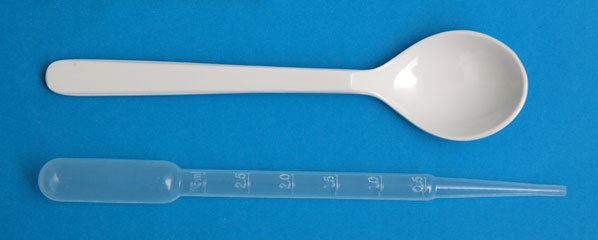 Photo 11: Using a plastic spoon or a plastic pipette with a bulb, algae can be collected from the bottom with taking little sand or organic debris. |
Soil samplesSometimes there is little vegetation (mountain streams, cleaned fens) where eventually only can be sampled from the soil. Stones can be scraped with a spoon, a knife, the edge of a sample vial cap or any instrument that is suitable. When the soil is soft, again there is a risk that sand and too much dead material is included. Now a spoon can be used (photo 11) with the back held slightly against the bottom. Moving the spoon gently back and forth horizontally swirls the upper film of the soil. The algae will slowly land on the spoon which can then be emptied into a sample vial. This type of samples is also called spoon samples. A newer technique uses a plastic pipette attached to or incorporating a bulb (photo 11). This handy little device can absorb the top film of the soil with care. |
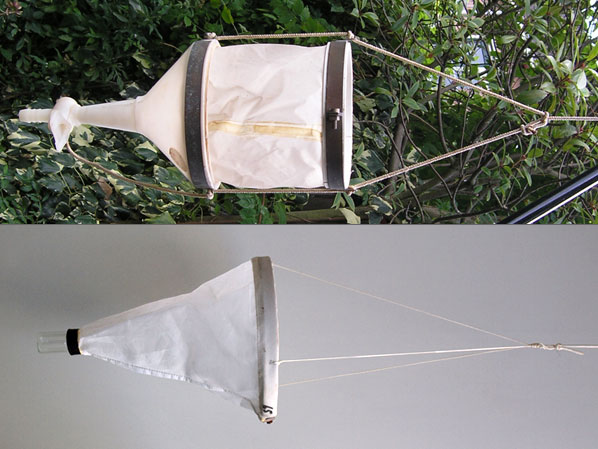 Photo 12: The upper plankton net is equipped with a tap, the lower one with a small removable container, but numerous variations are possitle. Photo © Henri Schlötz |
Net samplesA plankton net (photo 12) is ideal for collecting (tycho) planktonic desmids but it can also be used for collecting species that live between the leaves of aquatic plants. Therefore the net has to be strongly towed through the vegetation (photo 13) to stream the desmids by water movement from the vegetation into the net. This method is very useful in places where the vegetation is not within easy reach. For scientific research it is important to mention that the plankton net collected only plankton or that the net has been towed through the vegetation. When towing the plankton net to the shore, take good care that the bottom is not hit, otherwise your net is just filled with mud (photo 14). To detach the algae of the plankton net, keep the net in the water while keeping the netopening just above the water level. By gently shaking the plankton net, you lift it slowly out of the water so the water has time to drain from the net, getting the algae in the container. For large nets, you can also twist the net close to the opening. This will create a more or less sealed compartment, filled with water. By shaking this compartment gently back and forth the algae are released. After that, while moving the net a little, the water passes through the meshes and most of the algae will reach the container. As with many things: practice makes perfect! Some plankton nets have a container that can be unscrewed, other nets have a tap so the contents can be emptied into a sample vial. Is either not possible, then pick up the container on the outside and push it gently through the netopening after which you put the contents in a sample vial. A plankton net can be bought or you can make one yourself. This will not be discussed here, please search the internet for that subject. However, it is important to know something about the mesh size: a small aperture has the advantage that the smallest species can be collected, but the disadvantage is that it is just clogging quickly if a lot of algae are present in the water, especially species whose cells are surrounded with a mucous cell envelope. Then a net with a larger mesh size is recommended, in which case the smallest species will be missed. However, when the net is clogging with larger specimens, they will work as a filter, causing the smaller ones stay in the net. For collecting desmids, the most commonly used nets have a mesh size of 30 to 60 micrometers.
| |
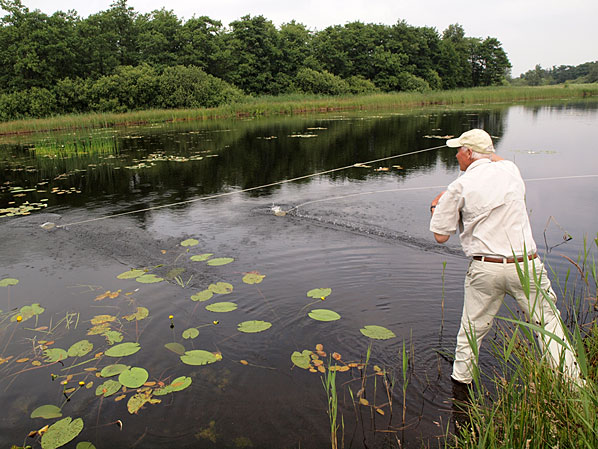 Photo 13: Here the plankton net is towed through the vegetation. | ||
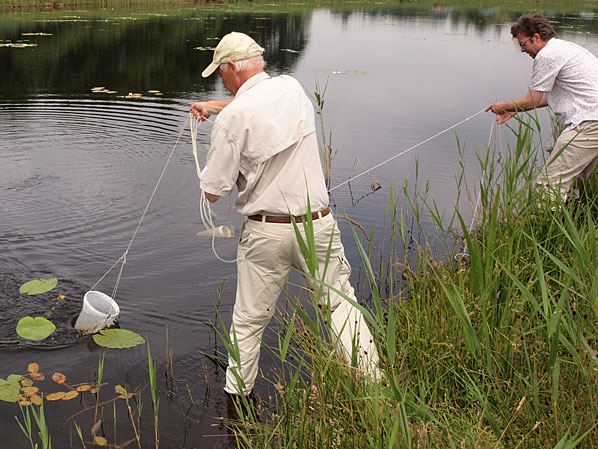 Photo 14: When towing the net to the shore, please lift up the net for the last piece so that no mud of the bottom comes along. | ||
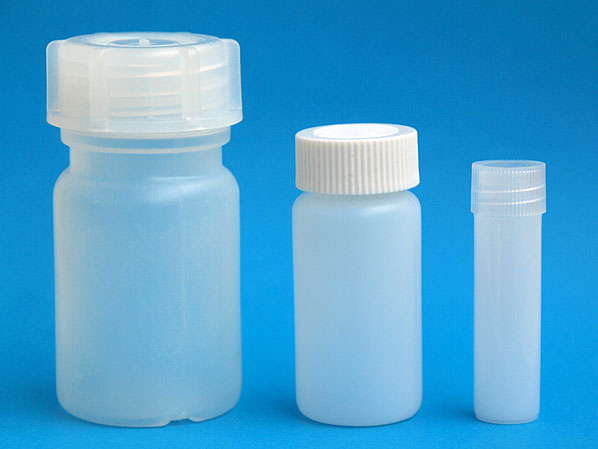 Photo 15: Sample vials of 50 and 25 ml and a tube of 5 ml. |
Sample vialsUsually 50 ml sample vials of soft polyethylene (PE) are used for collecting desmids (photo 15, left). These bottles are transparent and provided with good sealing caps. If you want to keep fresh material for a while, don't fill the bottle to the brim, so that some air remains above. When volume or weight is a problem, use 25 ml vials of hard PE material (photo 15, center). Because these bottles are less compressible, they are probably best suited for transport in an aircraft. These vials are also suitable for permanent storage.For sending samples by mail you can even use 5 ml tubes (photo 15, right). |
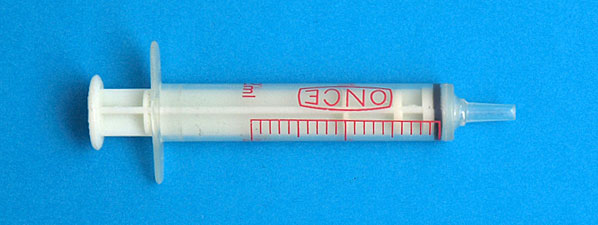 Photo 16: Syringe for dosing formalin. |
Sustainability and preservationLiving specimens of desmids can be stored for some time. The period of time depends upon the temperature and the amount of organic material in the sample. This can be more or less checked by smelling. When the sample smells bad it often cannot be kept long. Heavily contaminated samples collected on a hot summer day can already be spoilt before you get home. To prevent this some collectors take a cooler in the field. Some samples can be preserved up to 2 or 3 weeks, especially if kept in a refridgerator. In the latter case, of course, photosynthesis stops, because it is dark in the refrigerator. Finally, samples must be preserved if you want to keep them long. This is usually done with formaldehyde (methanal). This material is fortunately still freely available through pharmacies and comes in bottles with a concentration of 37% formaldehyde in water and this is called formalin . NB.: Formaldehyde is a gas and stimulates the nasal mucosa, so use it in a well ventilated area! For preservation of the samples, formalin has to be added until a final concentration of 3-4% is reached. This is done most conveniently using a (needleless) syringe (photo 16). After preservation with formalin the cell contents shrink and can hardly be used for taxonomic analysis. This is particularly distressing for the family Mesotaeniaceae and species of the genus Actinotaenium, because the chloroplast can be an important identification feature. Also other important taxonomic features are lost, such as extracellular secretions as with the genus Cosmocladium. Sometimes it is still possible to see the presence of one or more pyrenoids (condensations of the chloroplast) per semicel which in some desmid species is a distinguishing feature. One advantage of the shrinking of the cell contents is making the cell surface sculpture more visible which is very useful for the identification of, for example, small Cosmarium species. It is obvious that preserved sample vials should be provided with a unique collection number and preferably be stored in a dark cool place (photo 17).
|
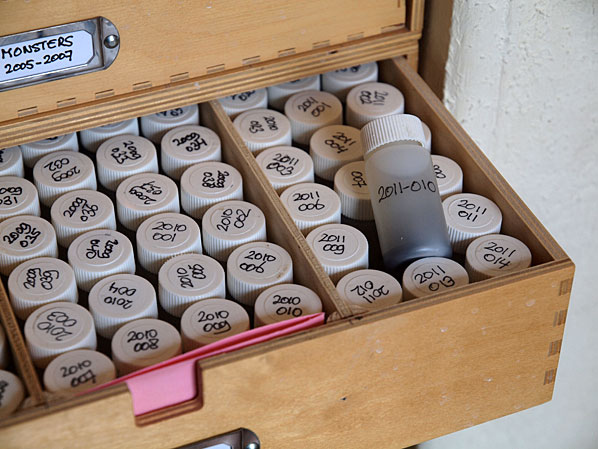 Photo 17: Archive box with preserved samples. | |
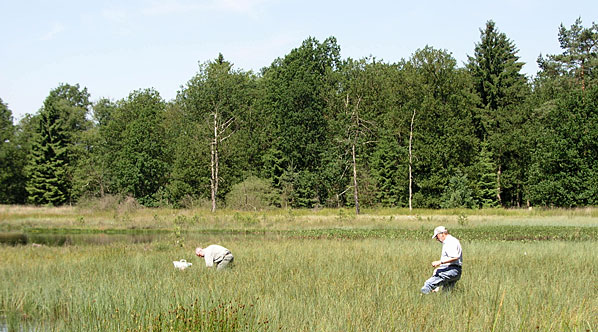 Photo 18: And finally, collecting desmids is a great opportunity to enjoy nature. |
Reference
Coesel, P.F.M.,1998. Sieralgen en Natuurwaarden. Wetensch. Meded. KNNV,
Utrecht. (in Dutch - see page 25 for sampling and analysis.)
Coesel, P.F.M. & Meesters, K.J., 2007. Desmids of the Lowlands. KNNV
Publishing, Zeist. (see page 16 for ecology and distribution.)
Acknowledgements
Text, photos © Alfred van Geest. Photo 12 © Henri Schlötz.